How Do We Understand Tooth Bleach Shades (BL1 vs BL4 vs Natural A1)?
Selecting the right color for your cosmetic restoration requires balancing personal aesthetic desires with the anatomical rules of light reflection, translucency, and facial harmony.
For international patients traveling to Vietnam for cosmetic dentistry, achieving a bright, attractive smile is the primary goal. However, selecting a shade that is too bright can result in an artificial, chalky appearance. Understanding how to choose natural tooth shade for veneers is essential to ensuring your new smile complements your features rather than overpowering them. Modern cosmetic dentistry offers a wide range of shades, from ultra-bright bleached tones to warm, realistic natural hues, allowing for complete customization.
During the planning phase, our clinical specialists analyze your smile using the industry-standard VITA shade guide and digital color-matching tools. This allows us to compare different ceramic options under consistent lighting conditions. To understand the differences between direct and indirect cosmetic procedures, read our comparison guide on porcelain veneers services page. If you are interested in reviewing the qualifications of our medical team, visit our dentists and clinical specialists page.
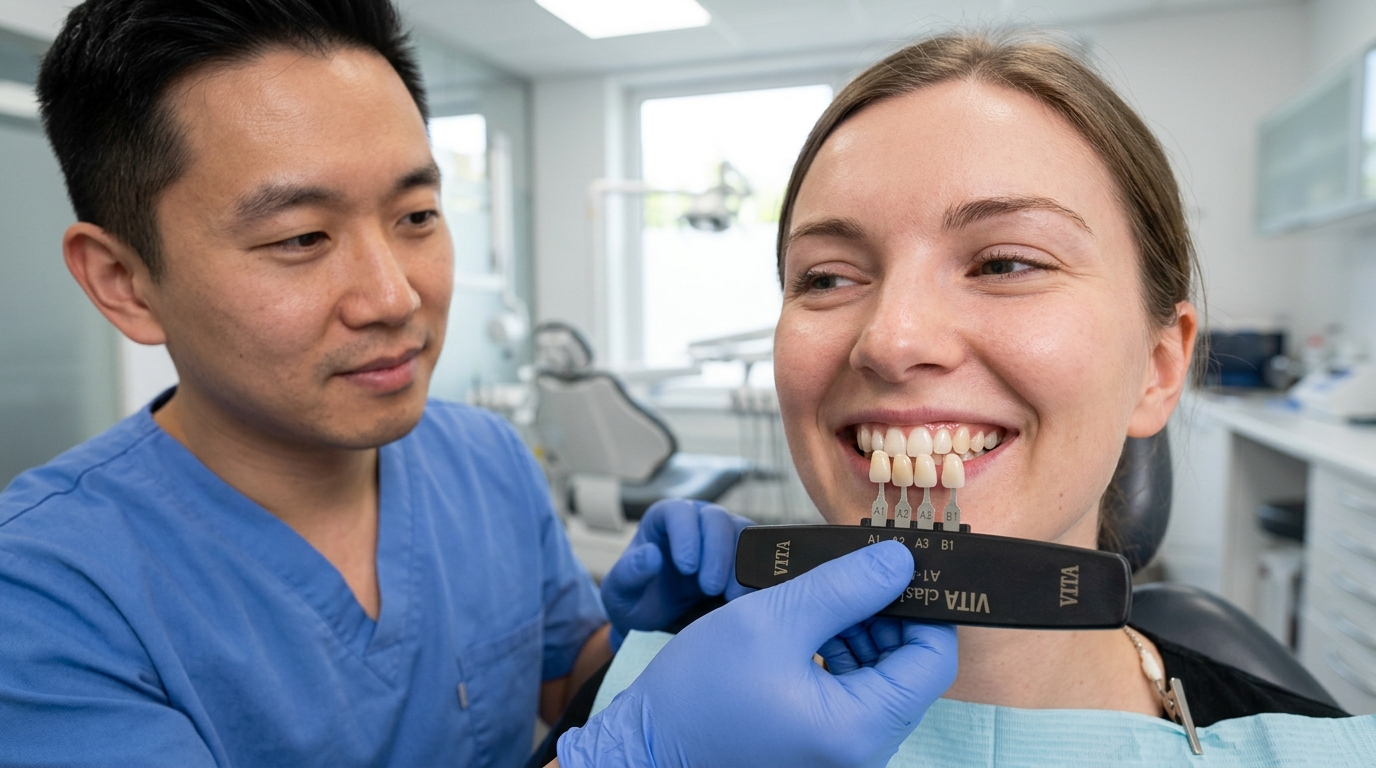
The standard bleach shade teeth chart includes four primary bleached shades, labeled BL1, BL2, BL3, and BL4, with BL1 being the brightest and BL4 being the most natural of the bleached group. Below these are the natural tooth shades, categorized by hue (A, B, C, D) and chroma (1 to 4). A1 and B1 represent the lightest natural shades available in human teeth before bleaching, making them the ideal choice for patients desiring a realistic, natural-looking smile makeover. In contrast, BL3 and BL4 offer high-impact cosmetic brightness, often referred to as the Hollywood look, which is popular for full-mouth reconstructions.
In clinical practice, Dr. Nguyen Huy Hoang notes that while many Australian patients request BL1 hoping for the brightest possible outcome, BL3 is often the sweet spot for a vibrant yet natural-looking smile makeover. Selecting BL1 requires incorporating higher translucency at the incisal edges to prevent the restoration from looking like opaque chalk. To understand different restoration materials, see our guide on composite bonding vs porcelain veneers durability.
| Shade Category | VITA Code Range | Visual Appearance & Recommendations |
|---|---|---|
| Bleach Shades | BL1, BL2, BL3, BL4 | Ultra-white, designed for high-impact cosmetic brightness (Hollywood look). BL3 or BL4 is recommended for a bright yet realistic cosmetic makeover. |
| Very Light Natural | A1, B1 | The brightest natural tooth shades. Highly recommended for patients seeking a clean, youthful, and realistic smile makeover. |
| Average Natural | A2, B2 | The average shade of healthy adult teeth. Recommended if matching single veneers to surrounding natural teeth. |
| Warm Natural | A3, B3 | Slightly darker, with visible yellow undertones. Typically used for older patients or lower teeth restorations. |
How Do We Match Veneer Colors with Skin Tone and Eye Sclera?
According to Dr. Nguyen Huy Hoang, lead cosmetic specialist at Dental NKT, the ideal tooth shade should not be brighter than the white of the patient's eyes to preserve a natural appearance.
To achieve a successful cosmetic dentistry color match, our clinical team evaluates several physical characteristics of the patient. The most critical reference point is the sclera, which is the white part of your eyes. As a general clinical rule, if the veneers are fabricated in a shade that is significantly brighter than the sclera, the teeth will stand out unnaturally, drawing negative attention. Keeping the shade within the brightness range of your eyes creates a balanced, harmonious look.
We also evaluate the patient's skin tone carefully. Patients with fair skin tones can comfortably wear lighter shades like BL3 or B1, as the skin contrast is low. However, patients with warmer or darker skin tones often look best with slightly warmer shades like A1 or A2, as a stark white BL1 veneer would create too much contrast. To learn more about our aesthetic planning process, check out our clinical 3D walkthrough.
Age plays a vital role in natural color distribution. Younger patients naturally have lighter, more translucent teeth, whereas older patients look more realistic with warm natural tones that reflect mature beauty. Our digital mockup system allows patients to preview these options on their face before any preparation begins. To inspect our facilities, visit our advanced technology and equipment page. To explore other articles, visit our dental handbook articles directory.
How Does Dental NKT Prevent the 'Fake White Chalky' Smile Look?
Achieving a realistic smile requires incorporating micro-textures, incisal translucency, and natural color gradients into the ceramic material.
The 'fake white chalky' appearance occurs when veneers are fabricated with high opacity and a single monochromatic color. Natural human teeth are not solid white blocks; they are translucent at the edges and have a color gradient that is warmer near the gumline and lighter at the incisal edge. At Dental NKT, we use premium multi-layered ceramic blocks and hand-layered porcelain to replicate these natural optical properties.
Furthermore, the physical thickness of the veneer defines how the lab technician creates optical depth. To achieve deep optical translucency using multiple hand-layered porcelain powders, the veneer typically requires a thickness of 0.5mm to 0.7mm. For ultra-thin 0.3mm minimal-prep restorations, our laboratory utilizes high-strength monolithic press ceramics (such as IPS e.max press). The master lab technicians then hand-craft micro-textures on the front surface of each veneer and apply custom external staining to mimic the natural ridges and light reflection patterns of human enamel. This technical distinction ensures that even ultra-thin restorations preserve natural enamel properties without looking flat or monochromatic.
Patients should also note that choosing premium custom hand-layered porcelain or multi-layered glass-ceramics involves higher laboratory fabrication and artistry fees compared to standard monolithic press ceramics. Our team ensures complete pricing transparency during your 3D planning session, detailing any laboratory upgrade fees in your treatment plan before the clinical phase begins. To explore our pricing index, visit our porcelain veneers cost index page. We also details our warranty policies on our global warranty terms page.
For more details on how minimal tooth preparation helps preserve natural enamel translucency, check our guide on minimal prep veneers tooth shaved. To discuss your case, please contact our clinical coordinators directly to obtain a personalized quote.
Want to see how different bleach shades look on your face? Upload your smile photo to receive a free AI-powered color simulation from our experts.
Upload Smile Photo for SimulationFAQ: What Are the Most Common Questions About Veneer Color Selection?
Q1: Is BL1 too bright for a natural-looking smile?
Yes. For the majority of patients seeking a natural-looking result, BL1 can appear unnaturally white and opaque. Most cosmetic dentists recommend BL3 or BL4 if you want a bright bleached look, or A1/B1 if you want the most realistic natural appearance.
Q2: Can I whiten my veneers if I want a lighter shade later?
No, ceramic materials are highly resistant to whitening gels and bleaching agents. The shade you select before fabrication is permanent, which is why matching the color correctly is critical.
Q3: How does the color of the underlying tooth affect the veneer shade?
If the underlying tooth is heavily discolored (such as from Tetracycline staining or root-canal treatment), thin translucent porcelain cannot block the dark underlay. In these cases, our clinical team utilizes specialized opaque ceramic ingots (such as High Opacity or Medium Opacity ingots) or specialized masking resin cements to prevent the dark background from showing through. For severe discoloration, preparing a slightly thicker veneer (0.5mm to 0.7mm) is required to ensure complete coverage.